
How to Build Ecommerce Website with AI Using Base44
Introduction
If you want to sell products globally, you can use Base44 to build ecommerce website faster with AI.
Whether you are testing a new product idea, launching a global ecommerce brand, or building a custom online store beyond a standard template, Base44 can help you move from idea to a working ecommerce website much faster.
Base44 is not only useful for simple prototypes or basic MVPs. With the right prompt workflow, you can use it to build a full-featured ecommerce website with product pages, database, backend logic, payment flow, order management, inventory management and admin dashboard.
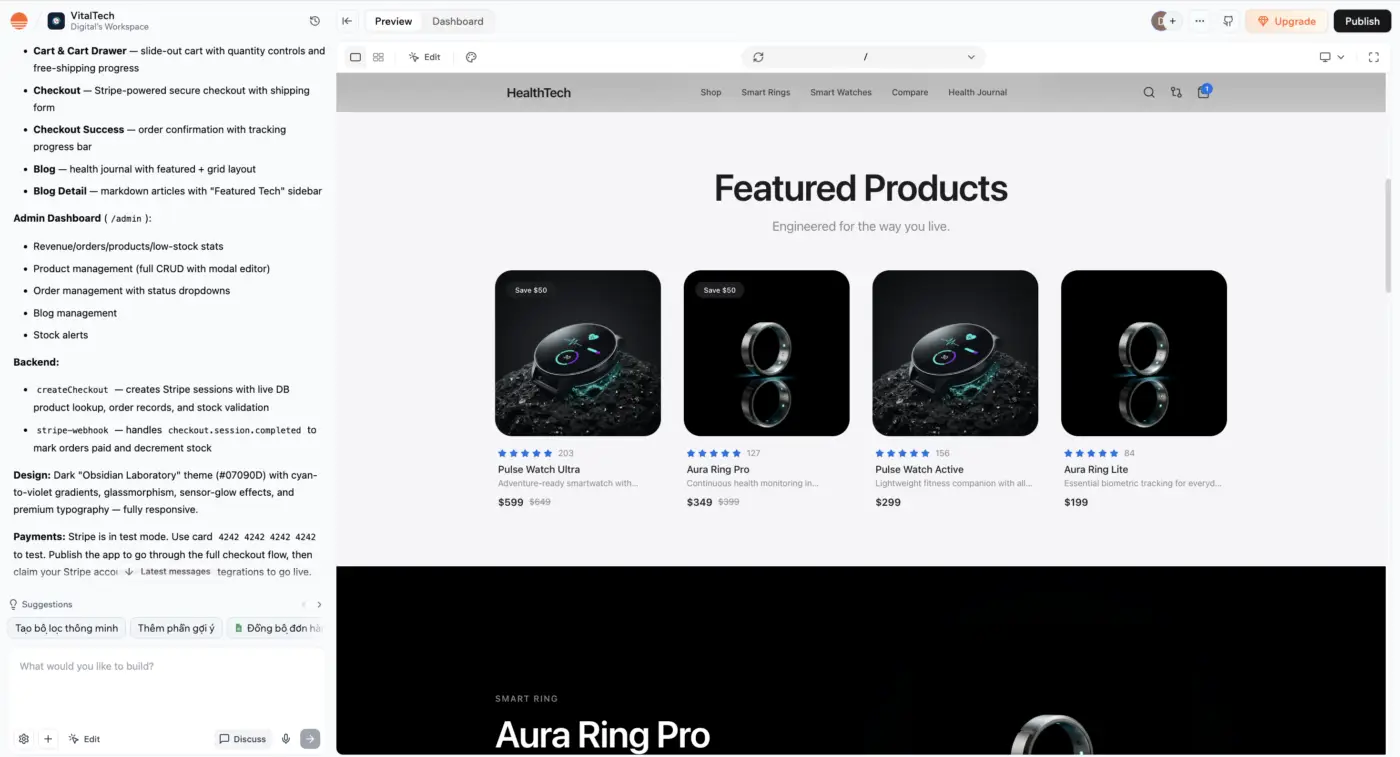
For this case study, I tested building an ecommerce website for smart rings and smart watches. The idea was to create a premium ecommerce store for smart health wearables, inspired by the clean and minimalist style of Apple.com.
This was not just a simple product landing page. The website included the core parts of a real ecommerce store, such as:
- Product catalog
- Product detail page
- Compare page
- Cart drawer
- Checkout page
- Stripe Checkout
- Checkout success page
- Blog/content hub
- Admin dashboard
- Product management
- Order management
- Inventory management
The key mistake is starting with a generic prompt like:
Build me an ecommerce website.
A better approach is to build the website phase by phase. Each phase handles one important part of the ecommerce system, from data and design to payment, product pages, cart, checkout, blog, admin and testing.
In this guide, I’ll show you how to build ecommerce website with AI by using a structured prompt workflow for Base44.
Overview: How to Build Ecommerce Website with Base44
To build ecommerce website for selling products globally, you should follow 15 main phases:
- Create the data model
- Set up the design system
- Integrate Stripe payment
- Build the layout and navigation
- Create the home page
- Create the ProductCard component
- Create the shop page
- Create the product detail page
- Create the compare page
- Create the cart page
- Create the checkout page
- Create the checkout success page
- Create the blog pages
- Create the admin dashboard
- Polish, test and prepare for launch
The full workflow looks like this:
Prepare the brand brief → Create data model → Set up design system → Integrate payment → Build layout/navigation/cart → Create home/shop/product pages → Create compare/cart/checkout flow → Create blog pages → Create admin dashboard → Test payment, orders, stock and mobile responsiveness → Publish.
The key point is:
Use ChatGPT or Claude to adapt the prompts to your product, niche, brand, target market and shipping logic.
Use Base44 to actually build the ecommerce website.
A Simpler Way: Use Plan Mode in Base44
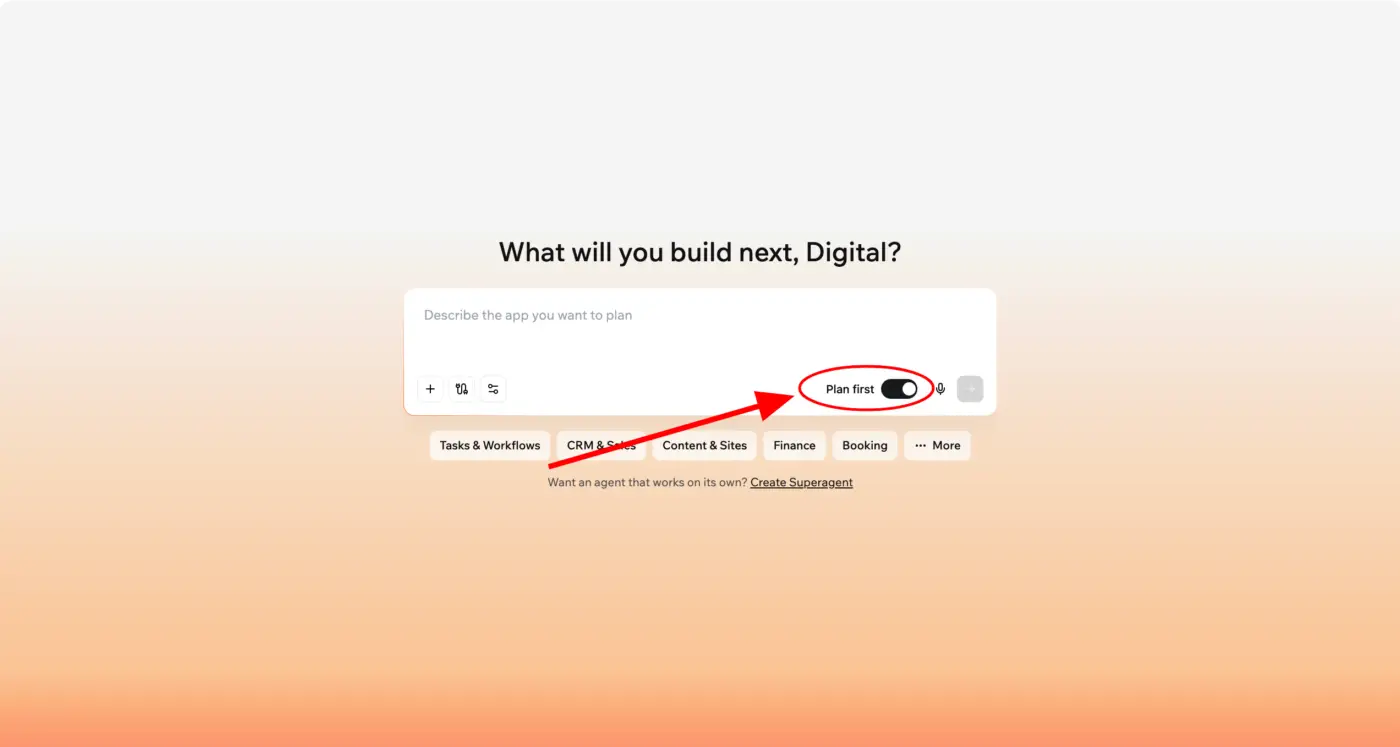
First, if you prefer simplicity, you can turn on Plan Mode in Base44, then enter a simple prompt such as:
I want to build an ecommerce website for a smartwatch product.
You can replace “smartwatch product” with your own product, such as skincare, fashion accessories, home decor, tech gadgets, digital products or any product you want to sell globally.
After that, just answer a few questions from Base44, and you’re done.
However, if you want to clearly understand a repeatable process, make sure to read the section below carefully. The step-by-step workflow will help you understand how to build ecommerce website with Base44 in a more structured way, from data model and design system to payment, product pages, checkout, blog and admin dashboard.
How to Use the Prompts in This Guide
The prompts in this guide use a HealthTech example, such as smart rings, smart watches, health features, battery life, water resistance and Health Journal.
If you sell skincare, fashion, home decor, tech accessories, sports products, digital products or handmade products, you should not copy the prompts directly into Base44 without adapting them.
A better workflow is:
Step 1: Copy the prompt from this guide.
Step 2: Paste it into ChatGPT or Claude.
Step 3: Ask ChatGPT/Claude to rewrite the prompt for your product, brand, market and ecommerce model.
Step 4: Copy the personalized prompt.
Step 5: Enter the personalized prompt into Base44.
You can use this prompt to customize any phase:
I want to build an ecommerce website using Base44.

Here is the original prompt:
[paste original prompt here]

My product information:
- Brand name: [enter brand name]
- Product line: [enter product line]
- Target market: [US / UK / Global / specific market]
- Product categories: [enter product categories]
- Product specs: [enter important product specs]
- Main customer: [enter target customer]
- Design style: [enter design style]
- Payment method: [Stripe / PayPal / payment link / other]
- Shipping rule: [enter shipping logic]

Please rewrite this prompt to fit my product and ecommerce model.

Requirements:
1. Keep the technical goal of the original prompt.
2. Replace irrelevant examples with my product information.
3. Keep the prompt clear, structured and easy to copy into Base44.
4. Do not add overly complex features beyond the MVP unless necessary.
Why Use Base44 to Build Ecommerce Website?
Base44 is useful when you want to build an ecommerce website without starting from scratch with traditional development.
The important point is this:
Base44 is not only for MVPs. You can use it to build a full-featured ecommerce website with frontend pages, database, backend logic, payment flow, admin dashboard and integrations.
For ecommerce, this matters because a real online store is not only about design. You usually need:
- A product catalog
- Product detail pages
- Cart logic
- Checkout flow
- Payment integration
- Order records
- Payment status updates
- Inventory management
- Blog/content hub
- Admin dashboard
- Backend logic
- Third-party integrations
Base44 can help you create these parts step by step through prompts. Instead of manually planning every database table, page, form, dashboard and payment flow from scratch, you can guide Base44 through a structured workflow.
For example, you can first create the data model, then design system, then Stripe payment flow, then product pages, then cart, checkout, blog and admin dashboard.
That makes Base44 useful for both early validation and more complete ecommerce projects.
If you are testing a new product idea, you can start simple. If you are building a serious ecommerce brand, you can expand the system with more features, better UI, stronger backend logic and more advanced integrations.
The key is not to ask Base44 to build everything in one prompt. A better approach is to separate the project into clear phases.
Before You Start: Prepare the Brand Brief
Before entering prompts into Base44, prepare your brand brief.
You can copy this template, ask ChatGPT or Claude to adapt it to your brand, then use the final version in Base44.
Brand name: [BRAND]
Product line: [e.g., Smart health wearables — rings & watches]
Design language: Apple.com-inspired — clean white background, large bold typography,
  alternating dark/light sections, minimalist navigation, generous whitespace.
Color palette: White #FFFFFF, Gray #F5F5F7, Dark #1D1D1F, Accent Blue #0071E3,
  Secondary text #86868B, borders rgba(0,0,0,0.05)
Font: Inter (heading + body)
Payment: Stripe (test mode → live)
Shipping: Free over $500, flat $25 otherwise
Key features: Product catalog, comparison engine, cart drawer, Stripe checkout,
  blog/health journal, admin dashboard
If you want to sell products globally, Stripe is often a strong payment option if it is available for your business setup. You can start with Stripe test mode, validate the full checkout flow, register your webhook and then move to live mode when ready.
If Stripe is not available for your business, you can adapt the payment phase to PayPal, payment links or another payment solution that fits your target market.
Phase 1: Data Model
This phase creates the core data structure for your ecommerce website.
You can copy the prompt below, ask ChatGPT or Claude to rewrite it for your product categories and specs, then enter the adapted prompt into Base44.
Create the following entities for my e-commerce store:

1. **Product** — name (string, required), slug (string), tagline (string),
   description (string), category (enum: [smart-ring, smart-watch], default: smart-ring),
   price (number, required), compare_price (number), currency (string, default: USD),
   images (array of strings), brand (string),
   specs (array of { label: string, value: string }),
   health_features (array of strings), battery_life (string),
   connectivity (array of strings), materials (string), water_resistance (string),
   colors (array of strings), stock (number, default: 0), sku (string),
   featured (boolean, default: false), rating (number, default: 0),
   review_count (number, default: 0), status (enum: [active, draft], default: active)
   Required: name, price, category

2. **Category** — name (string, required), slug (string, required),
   description (string), image (string), icon (string),
   display_order (number, default: 0)

3. **Review** — product_id (string, required), user_name (string),
   user_email (string), rating (number, min 1, max 5, required),
   title (string), comment (string), verified_purchase (boolean, default: false)
   Required: product_id, rating

4. **Order** — order_number (string), customer_name (string, required),
   customer_email (string, required), customer_phone (string),
   shipping_address (string), shipping_city (string), shipping_country (string),
   shipping_zip (string),
   items (array of { product_id, name, price, quantity, image, sku }),
   subtotal (number), shipping_cost (number), total (number, required),
   currency (string, default: USD),
   status (enum: [pending, processing, shipped, delivered, cancelled], default: pending),
   payment_status (enum: [pending, paid, refunded], default: pending),
   payment_intent_id (string), notes (string)
   Required: customer_name, customer_email, items, total

5. **BlogPost** — title (string, required), slug (string, required),
   excerpt (string), content (string), cover_image (string),
   author (string), author_avatar (string),
   tags (array of strings), related_product_ids (array of strings),
   read_time (string), status (enum: [published, draft], default: published)
   Required: title, slug

Also seed sample data: 4-6 products (mix of rings/watches with real specs,
images, prices $199-$499), 2 categories, 3 blog posts, and 2-3 reviews per product.
Phase 2: Design System
This phase creates a clean, premium and consistent Apple-style design system.
You can copy the prompt below, ask ChatGPT or Claude to adapt the visual style if needed, then enter the adapted prompt into Base44.
Set up the design system with an Apple-inspired aesthetic:

1. Update src/index.css with:
   - @import Inter font from Google Fonts
   - CSS variables: white background, #1D1D1F foreground, #F5F5F7 muted/card,
     #0071E3 primary (accent blue), #86868B muted text, border rgba(0,0,0,0.05)
   - border-radius 1.25rem (20px) for rounded cards
   - Custom utilities: .glass (frosted glass navbar), .gradient-text,
     .btn-primary (blue pill), .btn-dark (black pill), .btn-link (blue text link),
     .card-soft (subtle shadow card)
   - Animations: fade-up, fade-in, float (gentle hover), breathe (glow pulse)
   - Typography utilities: .heading-xl (clamp 2.5-5rem), .heading-lg (2-3.25rem),
     .heading-md (1.5-2rem), .text-balance
   - Smooth scroll, custom scrollbar styling, selection color blue

2. Ensure tailwind.config.js maps all CSS variables to Tailwind classes
   (background, foreground, primary, secondary, muted, accent, border, etc.)
   and sets fontFamily heading/body/display to var(--font-*).
Phase 3: Stripe Payment Integration
This phase creates the Stripe payment flow.
In this ecommerce setup, the goal is simple:
Customer adds products to cart → goes to checkout → the app creates an order → Stripe handles payment → the app updates payment status → stock is updated after successful payment.
You can copy the prompt below, ask ChatGPT or Claude to adapt the shipping/payment logic if needed, then enter the adapted prompt into Base44.
Set up Stripe checkout for my public app (no login required):

1. Create backend function "createCheckout":
   - Accept { items, customer, shipping } from frontend
   - Validate cart: fetch products from DB, check status=active and stock availability
   - Calculate shipping: FREE if subtotal >= $500, otherwise $25
   - Create an Order record in DB with order_number (HT-timestamp-random),
     customer info, items snapshot, subtotal, shipping_cost, total
   - Create Stripe Checkout Session:
     * mode: payment
     * line_items from verified products (price_data with images, description)
     * success_url: {origin}/checkout/success?order={order.id}
     * cancel_url: {origin}/cart
     * customer_email from form
     * shipping_address_collection for allowed countries
     * metadata: { base44_app_id, order_id, order_number }
     * shipping_options based on free vs paid shipping
   - Update order with payment_intent_id
   - Return { url, orderId }
   - Use service role (base44.asServiceRole) since app is public
   - Log all errors

2. Create backend function "stripe-webhook":
   - Handle stripe-signature verification using STRIPE_WEBHOOK_SECRET
   - On checkout.session.completed: update order payment_status=paid, status=processing,
     decrement product stock for each purchased item
   - On payment_intent.payment_failed: update order back to pending
   - Return { received: true }

3. Register the webhook for events: checkout.session.completed, payment_intent.payment_failed

4. Frontend checkout must check if running in an iframe — if so, block and alert user
   that checkout only works from the published app.
Phase 4: Layout and Navigation
This phase builds the app shell, navigation, footer, cart drawer and routes.
You can copy the prompt below, ask ChatGPT or Claude to adapt the navigation labels and categories, then enter the adapted prompt into Base44.
Build the app shell with an Apple-style navigation:

1. **Layout** (src/components/Layout.jsx):
   - Wrap with CartProvider (from CartContext)
   - Render Navbar, <Outlet />, Footer, CartDrawer
   - White background, #1D1D1F text

2. **Navbar** (src/components/Navbar.jsx):
   - Fixed top, transitions from transparent to frosted-glass (.glass) on scroll
   - Brand name on left (text only, no logo image)
   - Center nav links: Shop, Smart Rings, Smart Watches, Compare, Health Journal
   - Right: search icon, compare icon (with badge), cart icon (with badge), mobile menu
   - Mobile: full-screen overlay menu with large text links
   - Max width 1024px container
   - Use lucide-react icons

3. **Footer** (src/components/Footer.jsx):
   - Apple-style: #F5F5F7 background, small text, multi-column links
   - Top banner with shipping/returns/warranty message
   - Columns: Shop, Learn, Account, About
   - Bottom: copyright + country

4. **CartDrawer** (src/components/CartDrawer.jsx):
   - Slide-in from right, full height, max-width 448px
   - Dark backdrop overlay with blur
   - Shows items with thumbnail, name, quantity stepper, price, remove
   - Empty state with icon + "Browse Products" button
   - Footer: subtotal, shipping, total, checkout button (blue pill)
   - Free shipping progress indicator

5. **CartContext** (src/lib/CartContext.jsx):
   - Cart items + compare list persisted to localStorage (keys: ht_cart, ht_compare)
   - Functions: addItem, removeItem, updateQuantity, clearCart,
     toggleCompare (max 3), removeFromCompare
   - Derived: itemCount, subtotal, isOpen/setIsOpen

6. **utils** (src/lib/utils.js):
   - formatPrice(price, currency) using Intl.NumberFormat
   - cn(...classes) class name joiner

7. Update src/App.jsx routes inside Layout:
   / (Home), /shop (Shop), /product/:slug (ProductDetail), /compare (Compare),
   /cart (Cart), /checkout (Checkout), /checkout/success (CheckoutSuccess),
   /blog (Blog), /blog/:slug (BlogDetail), /admin (Admin)
Phase 5: Home Page
The home page creates the first impression for global customers.
You can copy the prompt below, ask ChatGPT or Claude to adapt the copy and sections to your product, then enter the adapted prompt into Base44.
Build the Home page (src/pages/Home.jsx) with Apple-style sections:

1. **Hero** — Black full-width section:
   - "New" eyebrow label, huge heading-xl brand name
   - Tagline subtitle in gray
   - "Shop now" blue pill button + "Learn more ›" text link
   - Floating product image with glowing gradient blob behind it (animate-breathe)
   - Image floats gently (animate-float)

2. **Featured Products** — Gray (#F5F5F7) section:
   - Centered heading + subheading
   - 4-column grid of ProductCard components
   - Loading skeletons while fetching

3. **Product Spotlight 1** — Black section (Smart Ring):
   - 2-column: text left, image right
   - Category eyebrow, heading-lg title, description
   - "Buy from $199" blue button + "Learn more ›" link
   - Floating image with glow

4. **Product Spotlight 2** — White section (Smart Watch):
   - Same layout, image left, text right
   - Dark button instead of blue

5. **Categories** — Gray section:
   - 2 large tiles (Smart Rings, Smart Watches)
   - Image background with gradient overlay, text bottom-left

6. **Features** — White section:
   - 4-column icon grid (lucide-react icons)
   - Each: icon in rounded square, title, description

7. **Health Metrics** — Black section:
   - 4-column metrics with icons (Heart Rate, Sleep Stages, Blood Oxygen, HRV)

8. **Blog Preview** — Gray section:
   - 3 latest posts with cover image, tag, title, excerpt
   - "View all ›" link

9. **Final CTA** — White section:
   - Centered heading + tagline + blue pill button

Fetch featured products and blog posts from entities on mount.
Phase 6: ProductCard Component
The ProductCard component is used across the homepage, shop page and related product sections.
You can copy the prompt below, ask ChatGPT or Claude to adapt the card style if needed, then enter the adapted prompt into Base44.
Create src/components/ProductCard.jsx:
- Square aspect-ratio image in rounded-3xl (#F5F5F7 bg)
- Hover: image scales up, "+" button fades in at bottom-right (white circle, shadow)
- "Save $X" badge top-left if compare_price exists
- Star rating row (5 stars, blue filled) + review count
- Product name (link to /product/:slug, hover blue)
- Tagline (1 line truncated)
- Price (bold) + strikethrough compare price
- Uses addItem from useCart for quick add
- Uses formatPrice from utils
Phase 7: Shop Page
The shop page displays your product catalog.
You can copy the prompt below, ask ChatGPT or Claude to adapt the filters and categories, then enter the adapted prompt into Base44.
Build src/pages/Shop.jsx:
- pt-24 for navbar clearance
- Centered heading that changes based on category filter (All/Smart Rings/Smart Watches)
- Filter tabs (pill buttons, active = dark bg)
- Sort dropdown (Featured, Price Low-High, Price High-Low, Top Rated)
- 3-column product grid using ProductCard
- Loading skeletons + empty state
- Reads ?category= from URL search params
- Fetches products with filter({ status: 'active' }) + sort parameter
- Max width 1024px container
Phase 8: Product Detail Page
The product detail page is your main conversion page.
You can copy the prompt below, ask ChatGPT or Claude to adapt specs, features and trust badges to your product, then enter the adapted prompt into Base44.
Build src/pages/ProductDetail.jsx (route: /product/:slug):
- Breadcrumb nav (Home › Shop › Product Name)
- 2-column layout:
  LEFT: Large image in rounded-3xl, thumbnail strip below (clickable)
        "Save $X" badge if discount exists
  RIGHT:
    - Category eyebrow (blue, uppercase)
    - Product name (4xl, bold, tracking-tight)
    - Tagline
    - Star rating + review count
    - Price (3xl) + compare price strikethrough
    - Color picker (pill buttons)
    - Stock indicator (green check "In Stock" / orange "Only X left" / red "Out of Stock")
    - Quantity stepper + "Add to Bag — $total" button (blue, disabled if OOS)
    - Compare toggle button (check icon when in compare list, max 3)
    - Trust badges row: Free Shipping, 2-Year Warranty, 30-Day Returns (3-column icons)

- Tabbed section below: Specifications / Health Features / Reviews
  SPECS: 2 cards — Technical Specs table + Description text
  FEATURES: Grid of health features with check icons
  REVIEWS: List of review cards with avatar, name, verified badge, stars, title, comment

- "You may also like" related products grid (same category, 3 items)
- Fetch product by slug, reviews by product_id, related products
- Loading spinner + not-found state
Phase 9: Compare Page
The compare page helps customers evaluate products side by side.
You can copy the prompt below, ask ChatGPT or Claude to replace comparison metrics with the right criteria for your product, then enter the adapted prompt into Base44.
Build src/pages/Compare.jsx (route: /compare):
- Empty state: icon + "Nothing to compare yet" + "Browse Products" button
- Product header row: thumbnail, name, tagline, price (best price highlighted blue),
  "Add" button, remove (X) button
- Spec comparison table rows: Price, Rating, Type, Battery Life, Water Resistance,
  Materials, custom specs, Connectivity, Colors
- "Highlight best values" toggle — highlights best numeric value per row in blue
  with check icon
- Grid layout: 160px label column + 1fr per product
- Gray background (#F5F5F7), white cards with soft shadow
- Uses compareList from CartContext (max 3 products)
Phase 10: Cart Page
The cart page lets customers review their order before checkout.
You can copy the prompt below, ask ChatGPT or Claude to adapt the shipping rule or free shipping threshold, then enter the adapted prompt into Base44.
Build src/pages/Cart.jsx (route: /cart):
- Empty state: icon + "Your bag is empty" + "Browse Products" button
- 2-column layout (2/3 + 1/3):
  LEFT: Cart items as white rounded cards
    - Thumbnail (24x24 rounded), name, SKU, quantity stepper, price, remove (trash icon)
    - "Clear bag" link below
  RIGHT: Sticky summary card
    - Subtotal, Shipping (FREE or $25), free shipping progress text
    - Total (2xl font)
    - "Checkout" blue pill button
- Gray background (#F5F5F7)
- Uses useCart for items, updateQuantity, removeItem, subtotal
Phase 11: Checkout Page
The checkout page collects customer and shipping information before payment.
You can copy the prompt below, ask ChatGPT or Claude to adapt it to your payment flow if needed, then enter the adapted prompt into Base44.
Build src/pages/Checkout.jsx (route: /checkout):
- Empty cart redirect to empty state
- 2-column layout:
  LEFT (form):
    - Contact section: name, email, phone (white inputs, rounded-xl, focus blue ring)
    - Shipping section: address, city/zip (2-col), country dropdown
    - Error message box (red) if any
    - "Pay $total" button (blue pill, with lock icon, loading spinner state)
  RIGHT (order summary):
    - Sticky white card
    - Order items with thumbnail + quantity badge + price
    - Subtotal, Shipping, Total
    - "256-bit SSL encrypted" trust line with shield icon
- On submit: check iframe (block if in iframe), call createCheckout backend function
  via base44.functions.invoke('createCheckout', { items, customer, shipping })
- Redirect to response.data.url (Stripe Checkout)
- "Secure payment powered by Stripe" header with lock icon
- Gray background (#F5F5F7)
Phase 12: Checkout Success Page
After payment, the customer should return to the checkout success page.
You can copy the prompt below, ask ChatGPT or Claude to adapt the success message to your brand, then enter the adapted prompt into Base44.
Build src/pages/CheckoutSuccess.jsx (route: /checkout/success):
- Reads ?order= from URL
- Fetches order by ID
- Loading state: spinner + "Confirming your order..."
- Success state:
  - Green check circle with breathing glow animation
  - "Order Confirmed" heading
  - "Thank you, {name}. Confirmation sent to {email}."
  - Order card: order number (mono font), total, items list, tracking progress bar
    (Placed → Processing → Shipped → Delivered, first step blue)
  - Buttons: "Continue Shopping" (blue) + "Read Health Tips" (gray)
- Gray background (#F5F5F7), centered content
Phase 13: Blog Pages
The blog helps with SEO, content marketing and customer education.
You can copy the prompt below, ask ChatGPT or Claude to adapt the blog name and content style to your niche, then enter the adapted prompt into Base44.
Build two blog pages:

1. src/pages/Blog.jsx (route: /blog):
   - Gray background, centered heading "Health Journal"
   - Featured post: large 2-column card (image + content)
   - 3-column grid of remaining posts (image, tag, title, excerpt)
   - Loading skeletons + empty state

2. src/pages/BlogDetail.jsx (route: /blog/:slug):
   - "← All Articles" back link
   - Tags + read time
   - Large heading (4xl, bold), excerpt
   - Author with avatar
   - Cover image (rounded-3xl, aspect-video)
   - Markdown content via react-markdown
   - "Featured Tech" sidebar: related products as horizontal cards
     (thumbnail, name, tagline, price, shopping bag icon)
Phase 14: Admin Dashboard
The admin dashboard helps you manage products, orders, inventory and blog posts.
You can copy the prompt below, ask ChatGPT or Claude to adapt product fields to your product line, then enter the adapted prompt into Base44.
Build src/pages/Admin.jsx (route: /admin):
- pt-24, gray background, max-width 1024px
- "Dashboard" heading + "Back to Store" link

- Stats row (4 cards): Revenue (green), Orders (blue), Products (violet), Low Stock (orange)
  Each: icon + large number + label

- Tab bar: Overview / Products / Orders / Blog (pill buttons, active = dark)

- OVERVIEW tab:
  - Recent Orders (5 latest with order#, customer, total, status badge)
  - Stock Alerts (products with stock < 15, red if < 10)

- PRODUCTS tab:
  - "Add Product" button (opens modal editor)
  - Table: thumbnail+name, category, price, stock (red if < 10), edit/delete actions
  - Product editor modal: name, tagline, price, compare_price, stock, sku,
    battery_life, water_resistance, materials, description, image URLs (textarea),
    health_features (comma-separated), colors, connectivity, specs (label:value per line),
    featured checkbox, category dropdown, status
  - Save creates or updates product, then refreshes

- ORDERS tab:
  - Table: order#, item count, customer, total, payment badge, status dropdown
  - Status dropdown updates order in real-time

- BLOG tab:
  - 2-column grid of post cards with cover, title, excerpt, View/Delete links

- Status badge colors: pending=orange, processing=blue, shipped=violet,
  delivered=green, cancelled=red
- All cards use .card-soft (subtle shadow)
Phase 15: Final Polish and Testing
This is the final QA phase before launch.
You can copy the prompt below and enter it into Base44 to review the full website.
Final polish checklist:
1. Ensure all pages have pt-20 or pt-24 for navbar clearance
2. All product images use aspect-square or aspect-video with object-cover
3. All buttons use .btn-primary (blue pill) or .btn-dark consistently
4. All cards use rounded-3xl + .card-soft
5. Loading states: spinner or skeleton on every async page
6. Empty states on every list page (cart, compare, blog, shop)
7. Error handling on checkout with user-friendly messages
8. Mobile responsive: grids collapse to 1-2 columns, nav becomes overlay menu
9. Test createCheckout backend function with a real product ID
10. Test stripe-webhook endpoint is registered and accessible
11. Verify all lucide-react icons exist and are imported
12. Verify all routes in App.jsx match actual page imports
After this phase, manually test the full flow:
View product
→ Add to cart
→ Cart
→ Checkout
→ Stripe payment
→ Checkout success
→ Admin sees order
→ Payment status updated
→ Stock decreases
Recommended Execution Order
Phase 1  → Data Model
Phase 2  → Design System
Phase 3  → Stripe Payment Integration
Phase 4  → Layout & Navigation
Phase 5  → Home Page
Phase 6  → ProductCard Component
Phase 7  → Shop Page
Phase 8  → Product Detail Page
Phase 9  → Compare Page
Phase 10 → Cart Page
Phase 11 → Checkout Page
Phase 12 → Checkout Success Page
Phase 13 → Blog Pages
Phase 14 → Admin Dashboard
Phase 15 → Final Polish & Testing
Do not paste all prompts at once.
Send one phase, wait for Base44 to complete it, review the result, then continue to the next phase.
Conclusion
If you want to sell products globally, Base44 can help you build ecommerce website faster than a traditional custom development process.
Base44 is not only for basic MVPs. With the right prompt workflow, you can use it to build a full-featured ecommerce website with product catalog, product detail pages, compare page, cart, payment integration, checkout success page, blog/content hub, admin dashboard, order management and inventory management.
The key is not to ask AI to build everything in one prompt. Instead, build the website phase by phase:
Data → Design → Payment → Layout → Pages → Cart → Checkout → Blog → Admin → Testing.
In short:
A global ecommerce website is not just a storefront. It is a complete selling system that connects your product, checkout, payments, orders, content and customer trust.